
The progressive grind is my answer to a conflict every hard-use blade contains.
Everyone wants the sharpest blade possible. Cutting is mostly a question of edge angle: the more acute the edge, the less the material being cut or penetrated resists it.
That same angle leaves less steel behind the edge. On a blade that will be abused, less steel means an edge that fails sooner.
Anyone ordering a hard-use blade wants it to hold up, and geometry answers that request with material — you add it, or you leave it where it is. Which is why hard-use blades tend to be thick.
The two demands pull against each other, and one is normally bought at the expense of the other. The same shape of problem as hardness against toughness.
The usual settlements
I am not the first maker to run into this, and there are several established answers.
The most common is to stop pretending it can be solved and pick a side. On a hard-use blade, toughness wins. The angle opens, the edge survives, the cutting suffers. Most working blades are built this way.
The second is the compound grind — an acute angle through the slicing section, a more obtuse one toward the narrow end of the blade, which is the part that starts the work and takes the first impact. It works, and it looks striking, which is not nothing. The name collides with compound bevel, which is a second angle sitting behind the edge — a different thing entirely. Here it means two angles along the length of the blade.
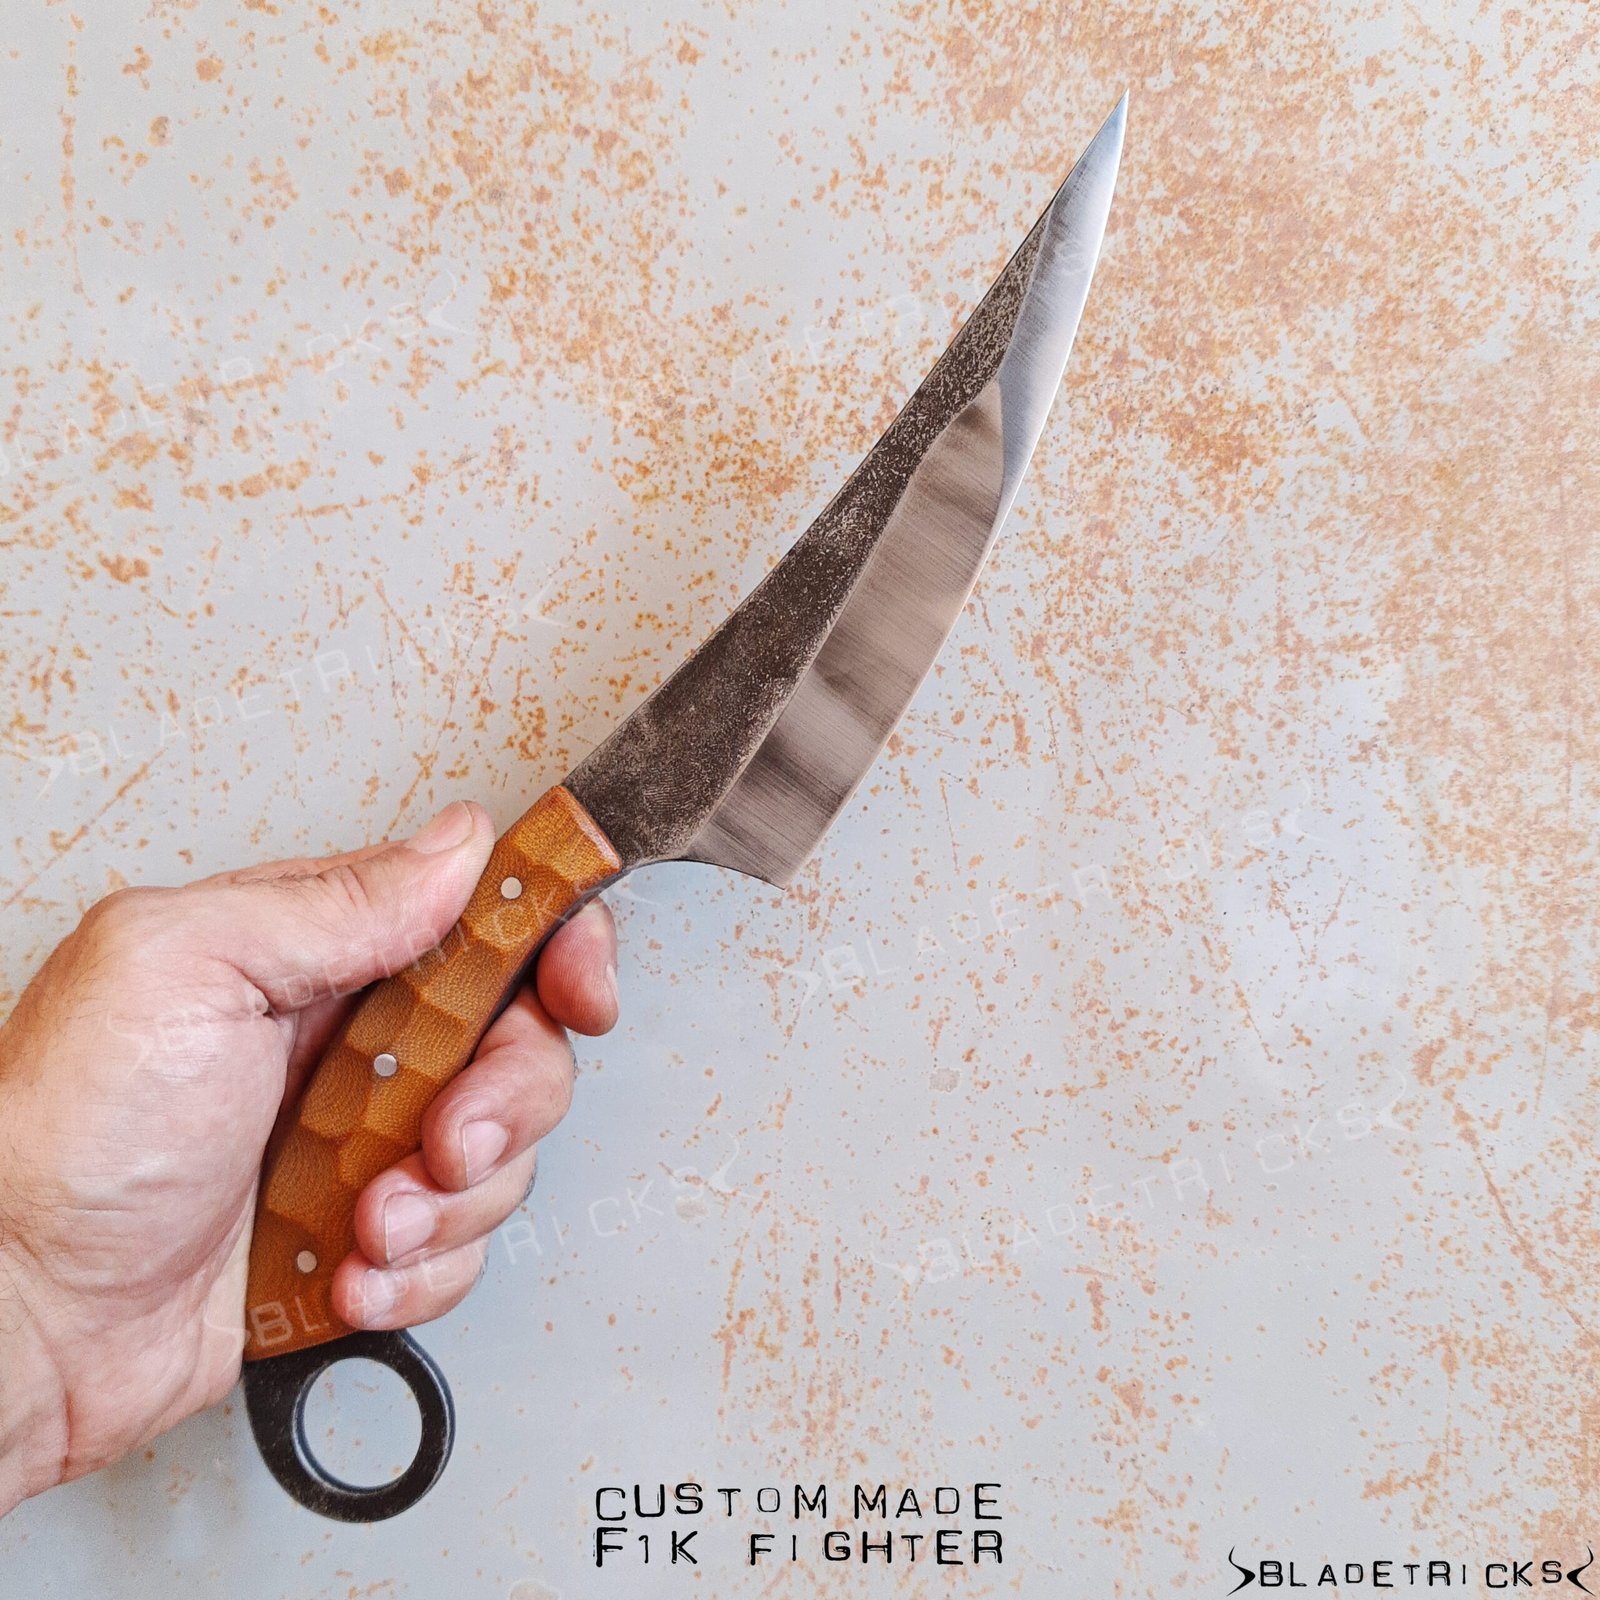
I used it for years. What bothered me was the step.
Two angles meeting means a transition, and that transition sits in the middle of an edge that otherwise wants to be one continuous curve. The rest of the knife runs in organic lines. The edge has a seam in it.
I wanted the same range of angles, arriving gradually.
How a bevel is actually ground
Every progressive grind I make happens on a belt grinder.
The blade blank is held flat against a contact wheel — a rubber-covered wheel that the abrasive belt runs over — and supported on a work rest, a fixed horizontal bar below it. The blank is drawn across, the belt takes steel off, and the bevel appears where the two meet.
My wheels are ten inches for most work, five or two inches on thinner blades. The machine is a Beaumont KMG-TX.
Two things stay fixed through the whole pass: the work rest does not move, and the blade’s faces are never tilted out of plane. Whatever changes along the edge, it is not the setup.
Three measurements decide the angle
I grind chisel — one side only, the other face left flat. That makes the geometry easier to state than a double bevel, because there is only one bevel to state. Why a point is better finished as a plane than as a cone is a separate argument I have made elsewhere.
Three measurements fix a chisel bevel completely:
- the stock thickness — how thick the steel was to begin with
- the land — the strip of steel left standing at the very edge before sharpening. I leave between 0.3 and 0.7 mm, depending on the knife.
- the bevel height — how far up the blade the ground surface reaches
Subtract the land from the stock and you have the steel removed at the edge. Spread that removal over the bevel height and you have a triangle. The angle of that triangle is the edge angle.
tan θ = (stock − land) ÷ bevel height
Nothing else enters it. Not the belt, not the pressure, not the hand.
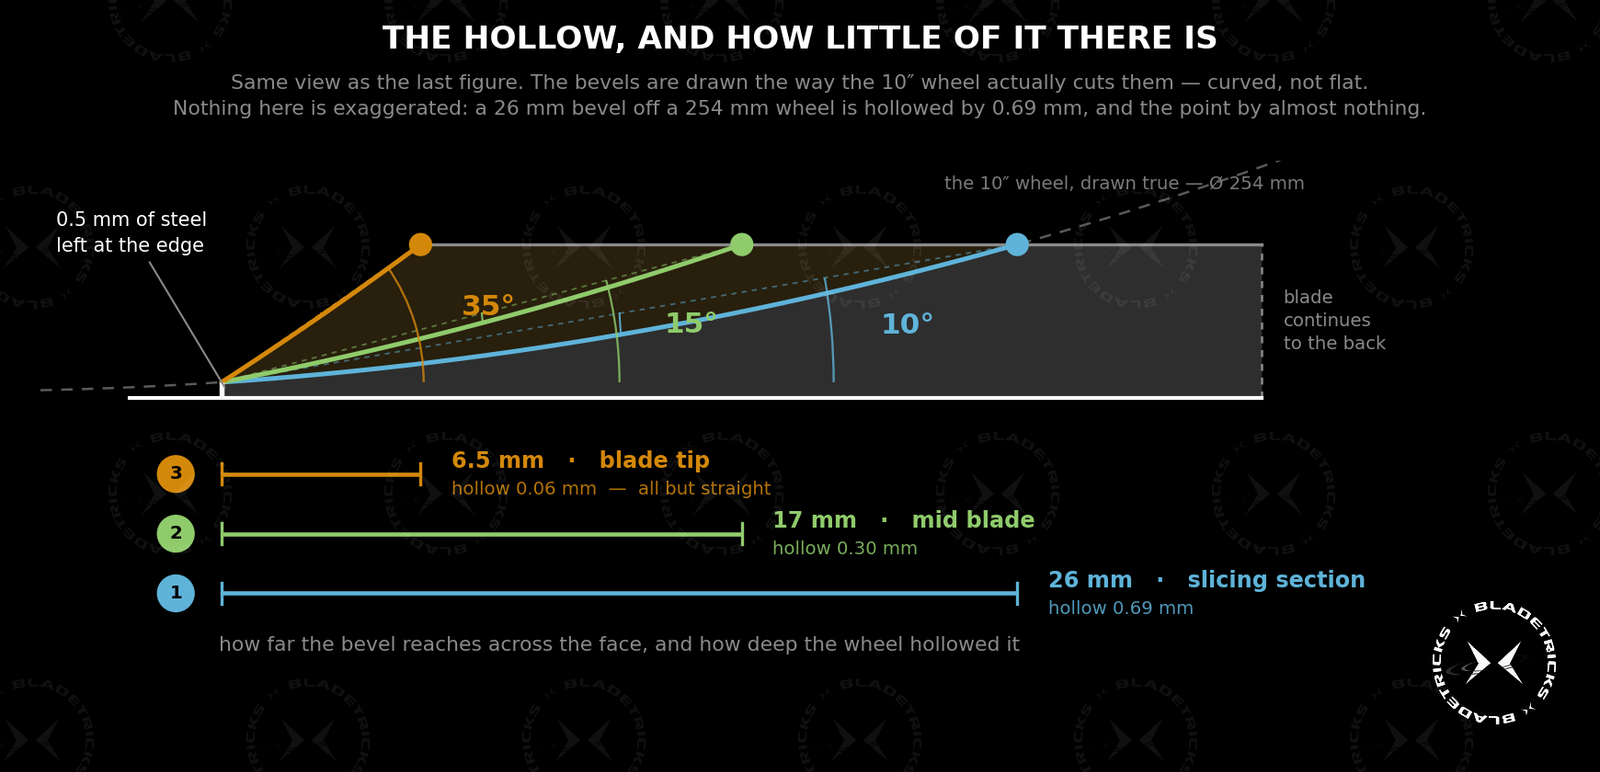
The wheel adds a little concavity, and less than most people expect. A bevel 26 mm tall, ground on a ten inch wheel, is hollowed by roughly two thirds of a millimetre. The bevel is near enough a plane. The hollow is a detail on top of it. And the hollow follows the bevel down. Where the bevel is 6.5 mm the wheel leaves six hundredths of a millimetre — nothing you could find with a straightedge.
One blade, worked through
The F1K is one of my recurring models — 310 mm overall, a 168 mm edge, ground from 5 mm stock. It has carried both the compound grind and the progressive one, which makes it the clearest thing I own to compare against itself.
Half a millimetre of land, a 26 mm bevel, 5 mm of stock. That gives 10° at the edge.
Not a number I aim for. A number those three measurements produce.
Where the progression comes from
A progressive grind comes out of two things. One is drawn, the other is not.
The one that is drawn is the blade itself. A blade is not a constant height. While it stays taller than the bevel, the bevel height is capped and the angle holds steady. Past the station where the blade becomes shorter than the bevel, the bevel has no choice but to follow the profile down — and the angle opens on its own.
On the F1K that handover falls about 70 mm from the point.
| Distance from the point | Edge angle |
|---|---|
| 70 mm and back toward the handle | 10° |
| 40 mm | 15° |
| 20 mm | 25° |
| 10 mm | 35° |
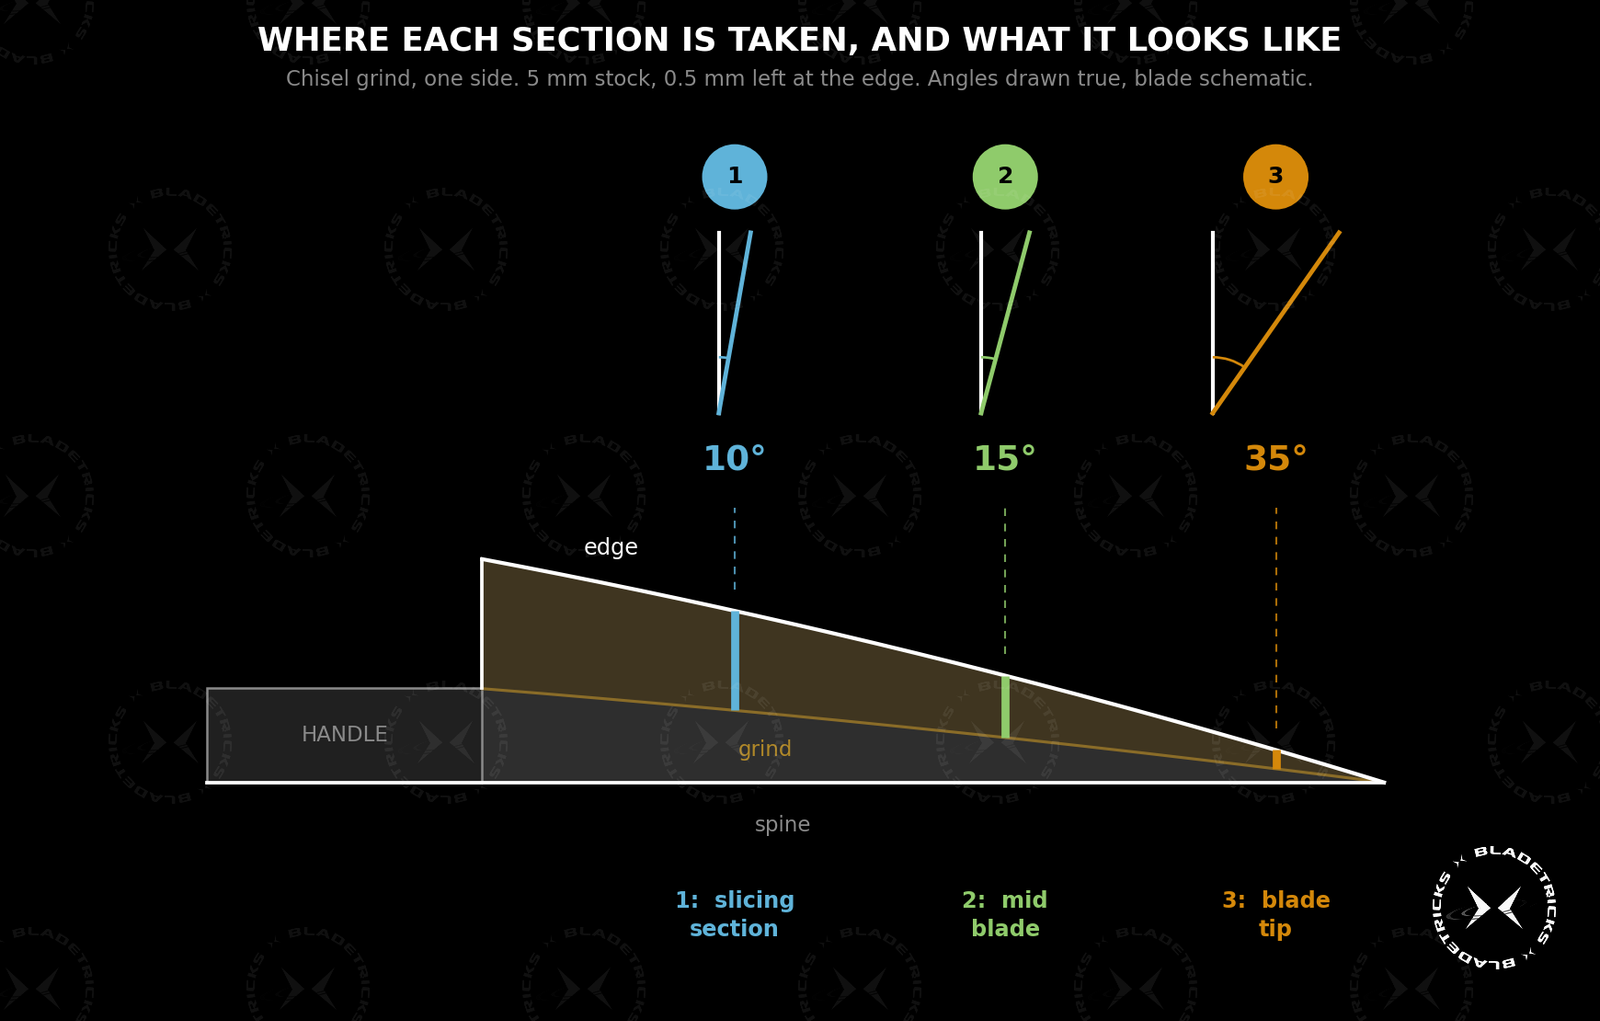
The profile writes that. I don’t.
The variable that isn’t written down
The profile is settled at the drawing stage and cannot be argued with afterwards.
The second one is settled in the first second of the pass.
The edge does not have to leave the plunge parallel to the work rest. Start it already tipped toward the point and the bevel height begins falling from the first millimetre, so the front of the blade progresses instead of sitting on its floor angle. Tip it further and the progression comes on earlier and harder. Tip it too far and the bevel runs out before the blade does, and the last centimetre ends up thicker than anything that section can use.
Nothing on the machine holds that angle. The rest is bolted down, the faces stay flat, and then there is a blank, a hand, and a difference of two or three degrees that will not show on any drawing of the finished knife and will be obvious the first time somebody uses it.
What sets it is the knife. What it is for, where it will be loaded, how it will be carried, who asked for it. Two blanks cut from the same profile, made for two different people, do not get the same tilt.
I learned it on blades that did not survive the lesson.
That part is not in the arithmetic, and it is the part I keep.
What the progressive grind costs and what it buys
The evidence is in the cross-section, and it is not subtle.
| Measured back from the edge | Slicing section | Near the point |
|---|---|---|
| 3 mm | 1.0 mm | 2.6 mm |
| 5 mm | 1.35 mm | 4.0 mm |
Two and a half times the material at three millimetres. Three times at five. Same blade, same pass, same half-millimetre of land at the apex.
As pure geometry the gap is wider still — a 10° bevel and a 35° bevel differ by a factor of four. What pulls the finished figure below that is the land itself: the same half millimetre at both ends, which counts for far more on the thin section than on the thick one. Half a millimetre decides more than it has any right to.
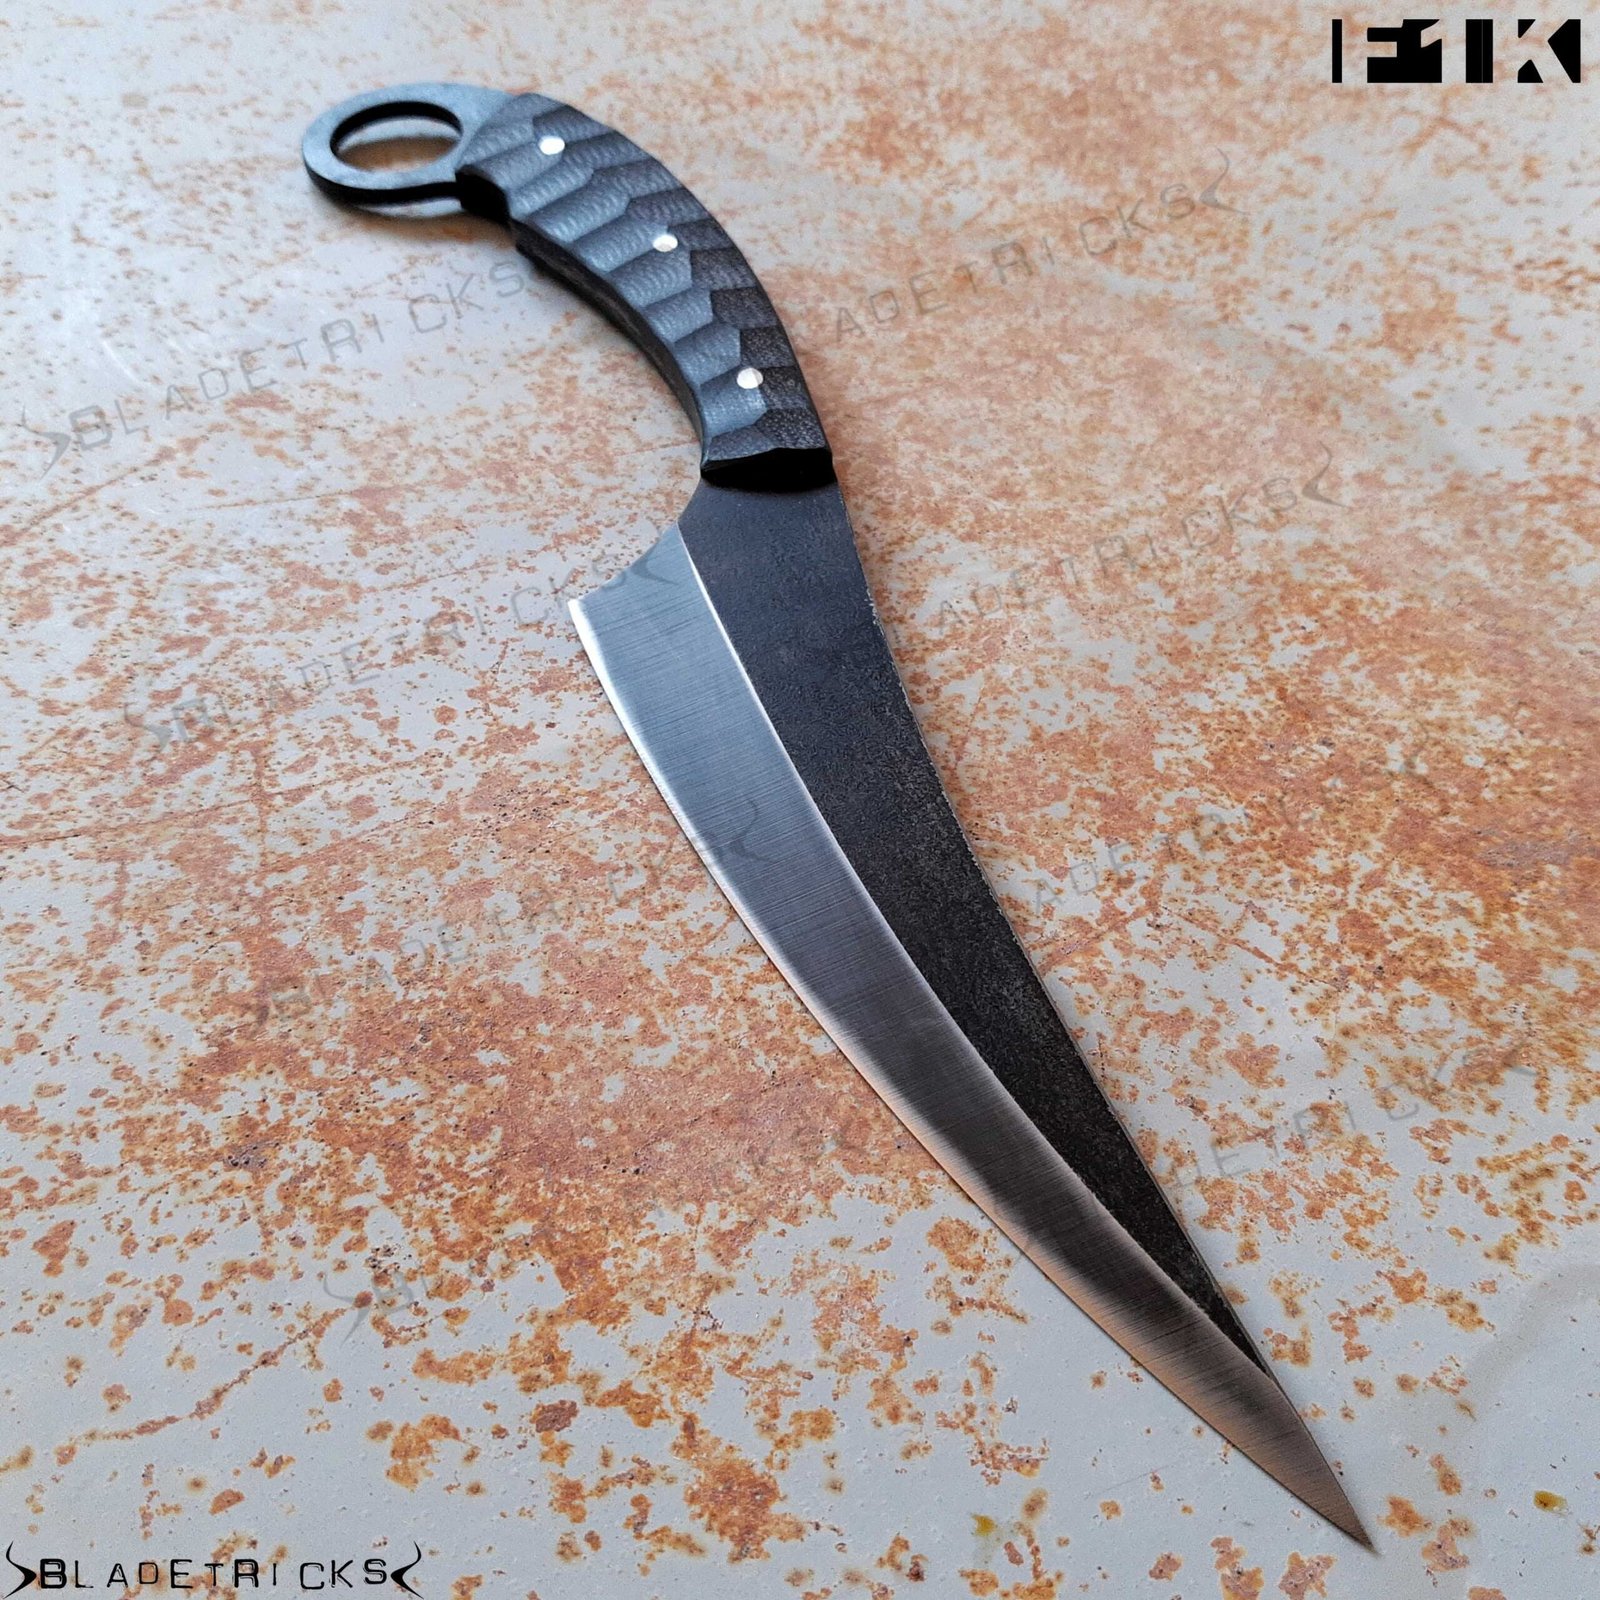
So the slicing section is as thin as I am willing to leave a hard-use blade. The section that leads into the work, that meets whatever is there first, that gets levered and twisted and stopped, is carrying three times the steel — exactly where a thin point breaks.
A fixed angle cannot do both. Set it at 10° and the point is as fragile as the belly. Set it at what the point needs and the blade stops cutting.
The same method, a different knife
The Diplomat is a slimmer piece — 180 mm overall, 3 mm stock, a blade 21 mm tall where it leaves the handle, with a 15 mm bevel.
Different numbers throughout. It still starts at 10°.
And then the two diverge completely. The F1K holds that angle for the first 90 mm of its edge and spends the whole progression in the last third. The Diplomat has no flat section at all — its profile gives the bevel nowhere to stay constant, so it opens from the plunge onward.
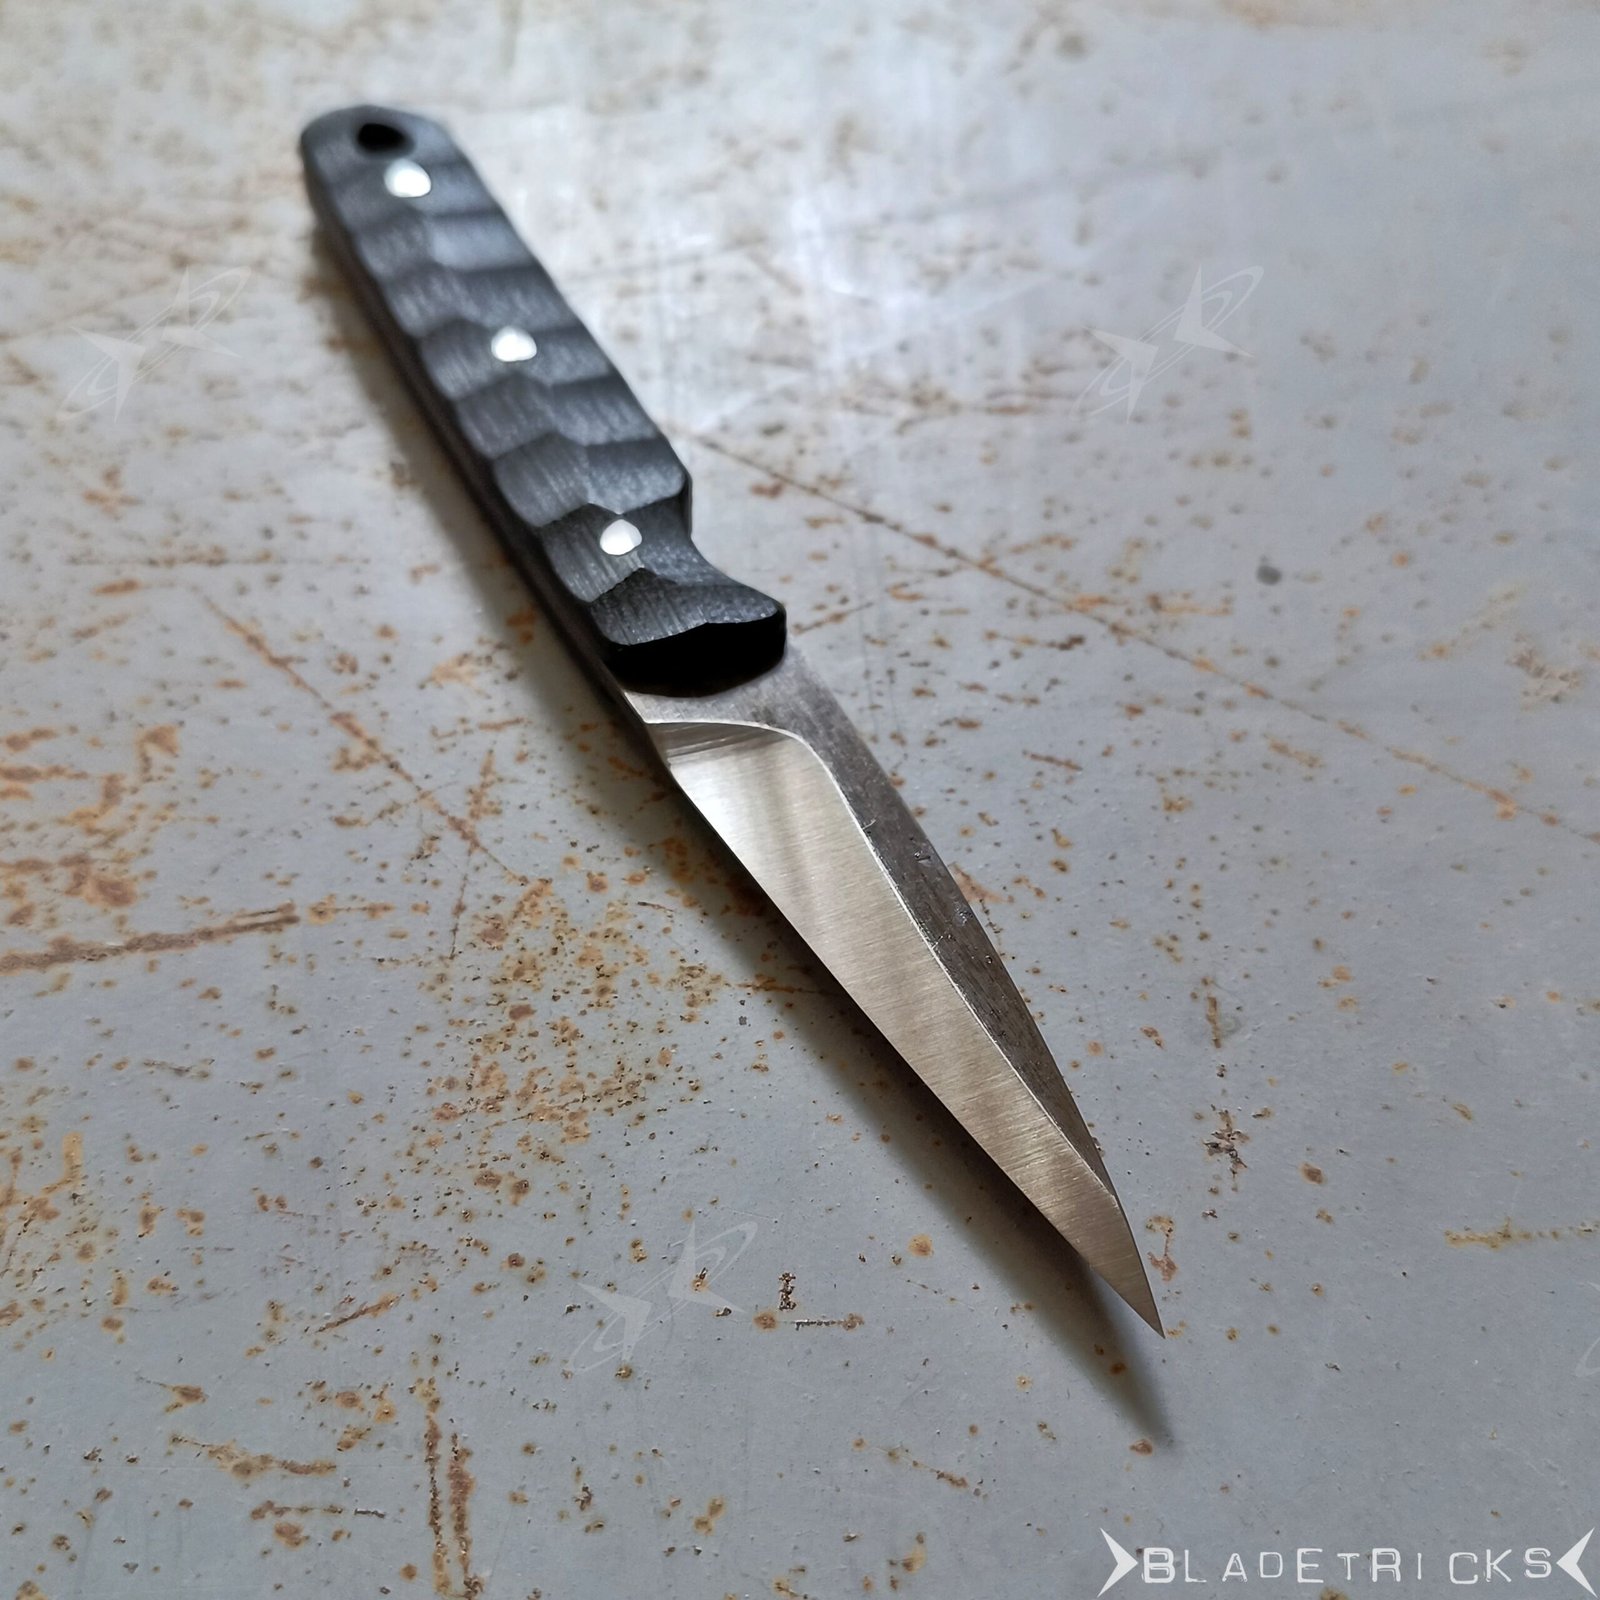
Same setup, same progressive grind, two different knives. The difference was decided when the profile was drawn, not at the machine.
What it gives you
- The whole slicing section at 10°. Every degree of thickening spent where the blade takes impact.
- Easier maintenance than a compound grind. There is no boundary to preserve.
- Easier sharpening. The angle changes, but gradually, and a stone follows it.
- No steps. A step can catch, and in some situations that matters.
- Cleaner lines.
The progressive grind costs more time at the machine than a constant bevel. It is the only way I have found to put both properties on one edge without leaving a seam in it.